As a resident of Brownwood, having easy access to key services is essential for maintaining the well-being of our community. Whether you’re dealing with utility issues, sanitation needs, or need to reach City Hall, we’ve compiled a list of essential contact numbers that every resident should have on hand.
City Hall
For any general inquiries or to connect with city officials, please contact City Hall at 325-646-5775.
Landfill
Need to dispose of waste that can’t go in your regular trash? Contact the Brownwood Landfill at 325-646-6574.
Recycle Center
For those who want to recycle and contribute to a greener Brownwood, reach out to the Recycle Center at 325-641-8832.
Sanitation Services
If you need assistance with brush pick-up or container services, the Sanitation Department is here to help. Call them at 325-643-4200.
Utility Billing
For inquiries related to your utility bills, including payment options, contact Utility Billing at 325-646-9700.
Utility Service Center
Experiencing issues with street repairs, water leaks, or sewer concerns? The Utility Service Center is your go-to resource. Call them at 325-646-6000 for assistance.
Pay by Phone or Text
For your convenience, you can pay your bills via phone or text using a debit or credit card. Simply call 866-283-3293 to get started.
For more information on services and resources, please visit the official Brownwood website at www.brownwoodtexas.gov.
By keeping these numbers handy, you can ensure that you’re always prepared to connect with the right resources when you need them most. Whether it’s managing your utilities, scheduling a brush pick-up, or addressing a water leak, the City of Brownwood is committed to providing the services you need to keep our community running smoothly.
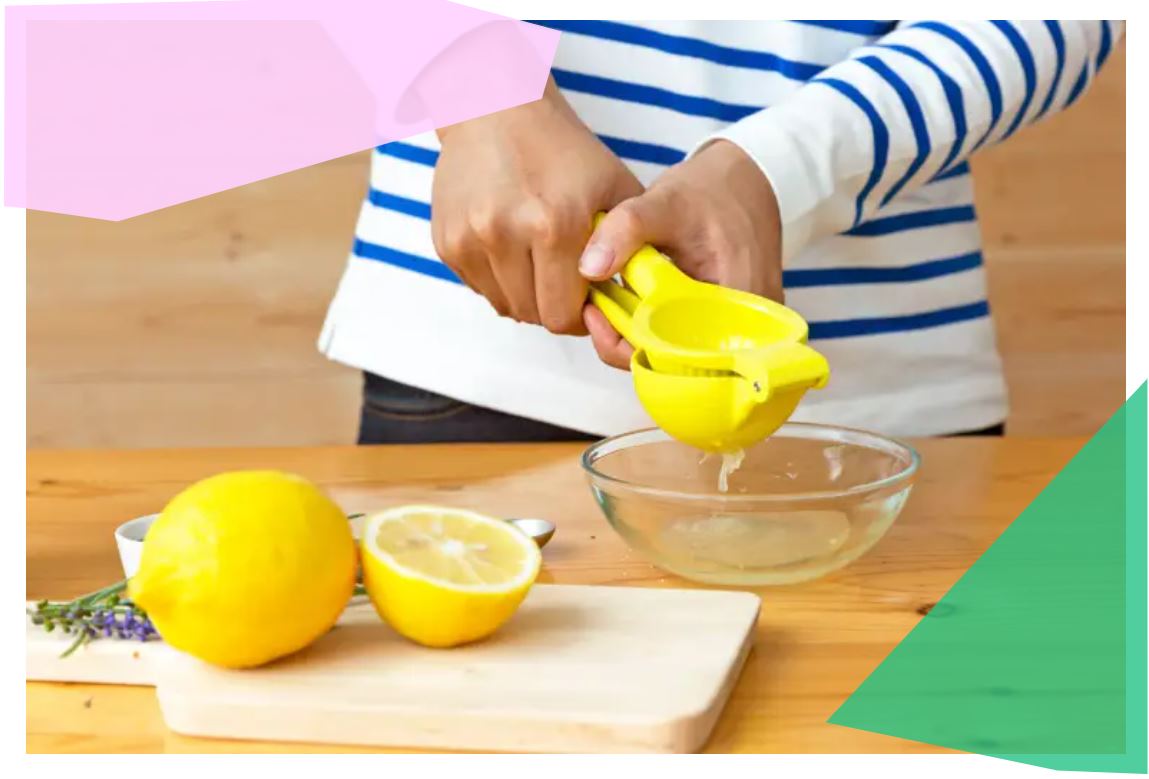
Putting your food into a stained and splattered microwave doesn’t seem that appetizing when heating up leftovers. While you can use various cleaning products to scrub yours down, you may want to go a more natural route — or maybe you just don’t want to have to head to the grocery store to pick up supplies. Instead, a lemon is all you need to have a fresh microwave in no time.
Why Use Lemon for Cleaning?
Lemons are a natural cleaning powerhouse, making them an ideal choice for this project — and a variety of other household needs. Their acidic properties effectively break down grease and grime, while their antibacterial qualities help eliminate nasty bacteria. Unlike chemical cleaners, lemons are safe in the kitchen and won’t leave any harsh residues behind. And who doesn’t love a lemony-fresh scent in the kitchen?
How to Clean Your Microwave With Lemon
You’re in luck. This method requires little prep and very little elbow grease. To clean your microwave this way, you’ll need a lemon, a sponge or rag, and a bowl of water.
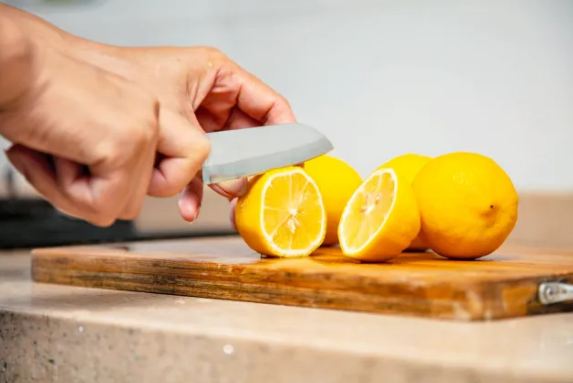
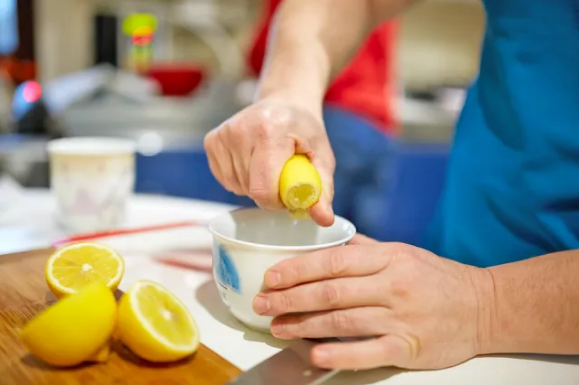
Step 1: Cut and Squeeze
Cut the lemon in half and squeeze its juice into the microwave-safe bowl. Place the lemon halves in the bowl as well. Add about half a cup of water to the bowl, ensuring that the lemon halves are submerged. The purpose of this is to get the water saturated with the lemon’s natural antibacterial properties while also having enough water to produce steam, which loosens the grime from the inside of the microwave.
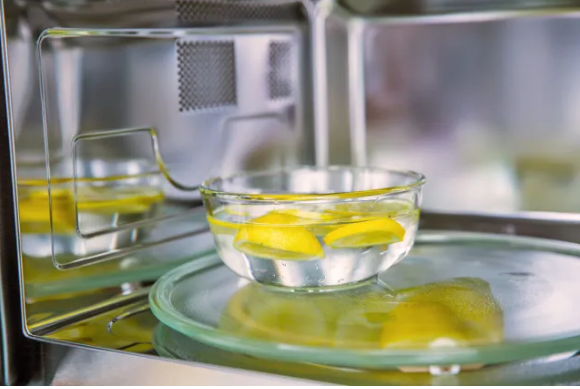
Step 2: Zap It
Place the bowl with the lemon solution inside the microwave. Set the microwave to 3-5 minutes and watch the magic happen. As the lemon-water solution heats up, it will produce steam that helps break down tough stains and spills. Allow the bowl to sit inside the microwave for an additional 2 minutes after the timer goes off, as the bowl of water will continue to produce steam, and you want the interior to be as damp as possible to make for easy scrubbing.
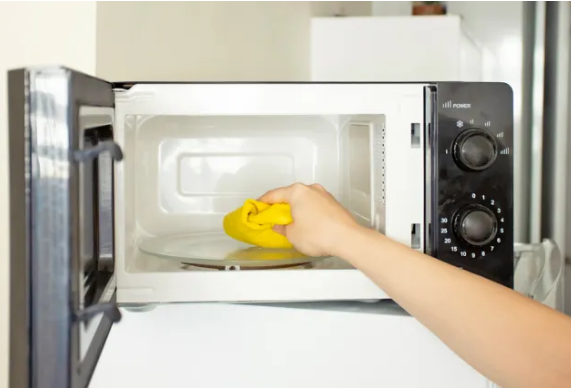
Step 3: Quick Wipe Down
Carefully remove the bowl from the microwave, which will be nearly at a boiling temperature. Take a clean sponge or cloth and wipe down the interior surfaces of the microwave, making sure to check those corners and the microwave roof where food tends to stick.
Step 4: Clean the Turntable
Remove the turntable and wash it separately with warm, soapy water. Rinse and dry it thoroughly before placing it back in the microwave. This ensures that every part of your microwave is thoroughly cleaned and ready for use.
How Often Should I Clean My Microwave?
Some people say you should clean your microwave every week, while others say about once a month or even twice a year. It depends on a few factors, including how often you are using your microwave and, as silly as it may seem, what you are cooking in there. If you are prone to using your microwave for saucy dishes or more odor-causing foods like fish, perhaps once a week may be right for you. But if you’re the kind who may just like the occasional bag of popcorn or to warm up your coffee, a week will most definitely be overkill. A good rule of thumb is that if you see or smell anything when you open your microwave door, it’s probably a good time to give it a scrub-down.
Rachel GreshWriter
Rachel Gresh is a Washington, D.C.-based freelance writer. When she’s not writing, you can find her wandering a museum, exploring an unfamiliar city, or baking something new in the kitchen.
You don’t have to be an avid environmentalist to care about your carbon footprint. The more we can all cut back on our energy consumption, the more we can keep our planet healthy. There are some obvious ways in which to accomplish this, such as running the air conditioner less frequently or using public transportation instead of a personal vehicle. Still, many other methods for lowering your carbon footprint may not be as evident, but they can make a huge difference. Here are a few environmentally friendly suggestions you can start doing as soon as today.
Cut Back on Video Calls
Video conferencing and online streaming have become a significant part of our personal and professional lives in recent years. But those video calls are using up incredible amounts of energy each time that you power your camera on. One hour of a video call can use over 1,000 grams of carbon dioxide, equivalent to over 10% of what you use each time you burn a gallon of gasoline. Consider simply turning off the camera during your next Zoom call, as that can lessen the impact on the environment by 96%.
Drink Different Milk
The type of milk you drink in your morning latte or on its own may have a negative environmental impact. It takes far more energy to produce dairy-based milk than it does the more common alternatives, such as soy, almond, and rice milk. So, even if you don’t have any dietary restrictions, consider switching to a more environmentally friendly milk the next time you stop by your local coffee shop.
Swap Clothes With Friends
Sometimes our wardrobes need an update, but manufacturing new clothing can produce tons of harmful carbon emissions. You can always go to a thrift store and purchase some older clothing or organize a fun clothing swap with friends. Clothing swaps are a great way to change up your style without supporting wasteful manufacturing practices. It also helps extend the life of clothing people would otherwise throw out or stuff in the back of their closet.
Only Do Full Laundry Loads
Doing partial or even half laundry loads contributes to wasted electricity and water. This is especially true if you’re using warm or hot water, as 90% of the energy washing machines use goes toward heating. In order to lessen your impact, only do loads of laundry when the hamper is full, as a half load and a full load will use roughly the same amount of water. Also, use cold water if possible. Lastly, consider air drying your clothes rather than using the dryer, which can reduce your emissions by about 67%.
Take Shorter Showers
Your morning shower is literally throwing wasted energy down the drain. The shorter your showers are, the less impact they’ll have on the environment. Limit yourself to just a few minutes, if possible, and use colder temperatures to cut back on the power used to heat the water. It could be worth buying a sustainable shower head as well, as those energy-efficient models can reduce the amount of waste in a major way.
Use Stairs Instead of Elevators
Elevators use copious amounts of energy, making it all the more wasteful if you ride up solo. For those who are physically capable, we recommend taking the stairs instead, as this helps reduce the number of trips that each lift makes. That being said, if you work on a higher floor or don’t have the physical ability to walk up stairs, then elevators are an inevitability. If this is the case, try to ride the elevator with other people instead of by yourself to cut back on the number of trips each elevator makes.
Buy Carbon Credits
You can purchase carbon credits to offset your overall footprint if you’d rather not change your lifestyle. Sites like Terrapass allow you to pay money to fund projects that aim to reduce emissions, such as planting trees and capturing landfill gas. Terrapass offers individuals and businesses the chance to take advantage of these programs depending on your financial means. Check out their carbon footprint calculator to determine how much output you’re producing and if there are any projects you can invest in to help lessen your impact.
Bennett KleinmanStaff Writer
Bennett Kleinman is a New York City-based staff writer for Optimism Media. He is also a freelance comedy writer, devoted New York Yankees and New Jersey Devils fan, and thinks plain seltzer is the best drink ever invented.
Unless your name is Nosferatu, filling your house with natural light is a lovely feeling. While fluorescent bulbs do a fine job at lighting up a home, they simply don’t compare to having the sun shine directly into your living room. That being said, some areas of the house are harder to light than others due to a lack of windows. This creates a few dreary spaces that could benefit from more natural light. Thankfully, there’s a way to fix this problem. Here’s how to bring more natural light into those darker rooms.
Mirrors are fantastic means of reflecting natural light into darker corners of the room. Hang a mirror directly across from a large window to capture the light and help disperse it around the room. Also, consider hanging a big mirror on a wall perpendicular to the window, which will reflect light at a sharper angle to bypass obstructions. Keep in mind that the bigger the mirror and the bigger the window, the more well-lit you can make a room.
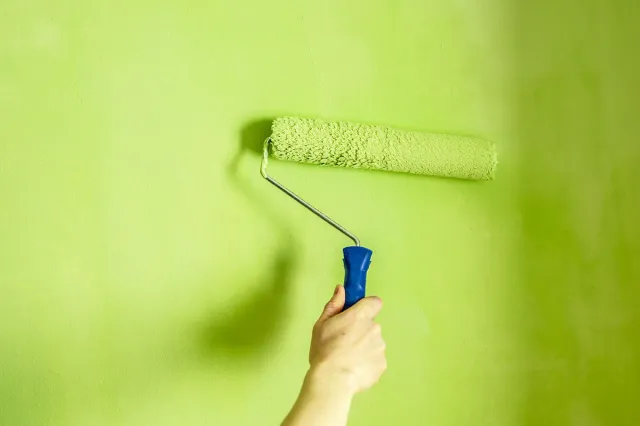
The perfect piece of art can reflect your personality, but it can also inhibit a room from being as bright as possible. Paintings and other wall-hanging objects absorb light and prevent it from bouncing around the room, especially if the art is painted a darker color. Bare walls, however, do a much better job of reflecting light, particularly walls of a lighter color. Consider relocating art from those darker rooms and even giving the walls a new, brighter paint job if necessary.
Privacy is important, but those blackout shades and wooden slats obstruct light. Consider purchasing a set of sheer curtains instead, which allow plenty of light to permeate through the fabric and brighten up a room. The thinner material doesn’t mean sacrificing quality, either, as the right set of sheer curtains will last for as long as those made of more durable fabric.
Think of the last time you cleaned your windows—is it longer ago than you’d care to admit? Unfortunately, many homeowners and apartment renters neglect to wipe down their windows on a regular basis. All of that built-up grime and dirt may prevent light from shining through as vibrantly as it could. Contact a professional window cleaner to get the job done right, or bust out those DIY supplies and get to work yourself. Either way, you should notice brighter rooms in no time at all.
Bushy trees outside your windows may be blocking light from entering the home. While you can remove the trees altogether, that will drastically reduce your home’s curb appeal. Instead, contact a professional tree maintenance crew to trim down those dense leaves. Removing a couple of branches could make a huge difference in the light your home receives.
Matte finishes are far better than glossy finishes in terms of reflecting light. While glossy finishes are shiny, they also produce tons of glare. Lighter matte finishes reflect light far better without producing any glare. Consider applying a matte finish to the walls and decorating the room with some lighter-colored matte furniture. Both of these will go a long way towards brightening those darker rooms.
If you’re looking to boost a room’s brightness, don’t neglect painting the ceiling and floors in addition to the walls. Painting the ceiling a bright color can really help to reflect light into every corner of the room. If your floors are made of a paintable material like wood or concrete, consider applying a coat of lighter-toned paint to those as well.
Skylights are a luxury, but they may not be as expensive as you think. The average skylight installation cost is around $1,750, though that price can dip as low as $1,000 in certain places. If you can afford a skylight, it can totally transform a darker room and make it brighter than you could’ve ever imagined.
Bennett Kleinman Staff Writer
Bennett Kleinman is a New York City-based staff writer for Optimism Media. He is also a freelance comedy writer, devoted New York Yankees and New Jersey Devils fan, and thinks plain seltzer is the best drink ever invented.
You can accomplish a lot in just one hour, such as getting in a good workout at the gym or watching three episodes of Friends reruns. You can also clean your house in one hour, even if the place currently looks like a disaster. By setting aside 60 minutes each week, you can easily transform your house from a cluttered mess into a well-organized sanctuary. This speed cleaning concept is ideal for people who wish they had more free time to clean around the house, as you’ll really notice a stark difference in just an hour.
With only an hour available, it’s hard to imagine cleaning every corner of the house in just one go. Make an assessment of which areas need the most attention. Maybe you’re having guests next week, so you should tackle the guest bedroom and bathroom. Or perhaps you’re hosting a dinner party soon, in which case the dining area should receive special care. These rooms should be prioritized to some degree, and you can always move on to the others if you have any time left over afterward.
With such a short window to clean, every minute is precious, and you don’t have time to deal with the unexpected. So before diving into the hour-long clean, eliminate any potential distractions. This could mean shutting your phone off, asking your spouse to run an errand, or telling your children to head to the park and play there for a bit. Once you’ve got the house all to yourself, set a timer for 60 minutes and get to work.
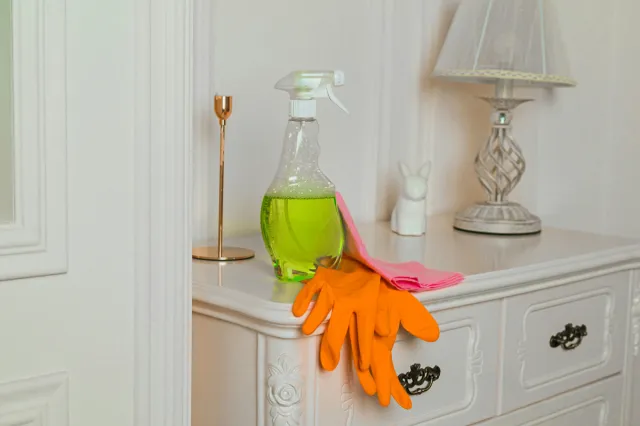
Before scrubbing away on your hands and knees, go room by room and eliminate any obvious clutter. Place dirty laundry in the hamper, put your dog’s toys away, remove anything from your bathroom countertop, and so on. This quick scan of the entire home should only take a few minutes and clears the way for scrubbing and dusting.
Pretreat Where Necessary
Certain cleaning products require time to work, such as placing bleach in the toilet or treating dirty grout with hydrogen peroxide. If you know anything needs time to settle, then go ahead and tackle this step next so that you’re not rushing at the very end.
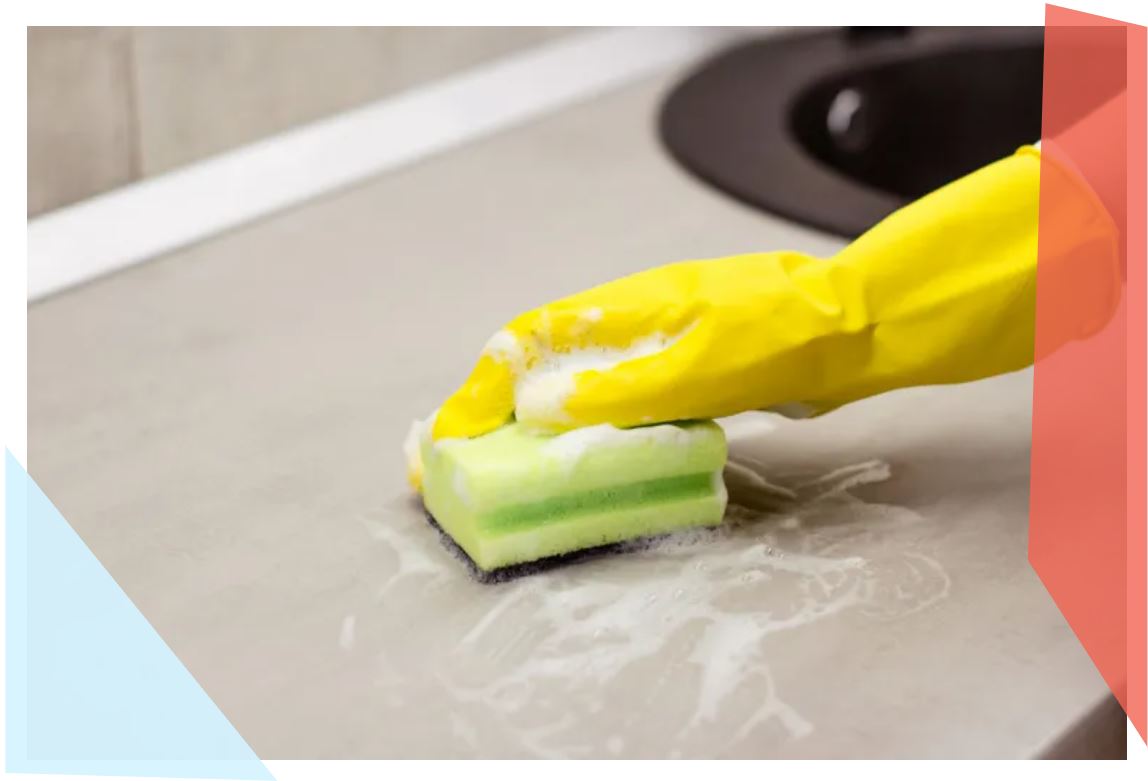
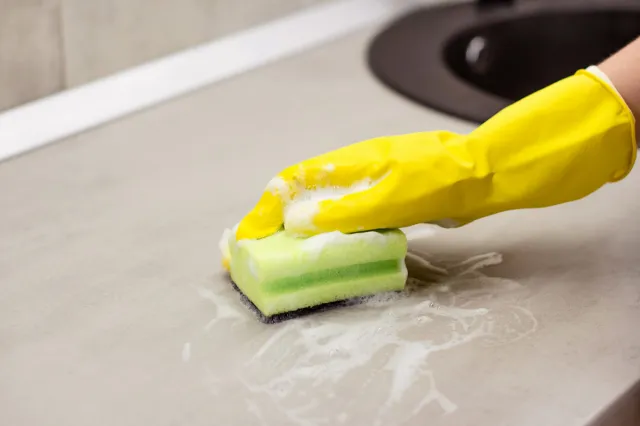
Bathrooms and kitchens are generally the messiest places in the home and require extra care when cleaning. While this may eat away at a good chunk of the hour, it’s important to focus on these rooms rather than let them get worse. Cleaning the bathroom may take up to 30 minutes this time, but hopefully, that number will decrease each week as you grow more comfortable with speed cleaning.
It may be tempting to rest, but remember that the timer is rapidly counting down to zero. That’s why keeping going at a sprinter’s pace for the whole hour is important, knowing you’ll have time to breathe when the 60 minutes are up. If you sit down for five minutes while the timer is going, you’re doing yourself a disservice and preventing your house from being as clean as possible.
No matter which room of the house you’re in, always dust from top to bottom. If you go from bottom to top, the dust may fall onto areas you’ve just cleaned. Once you’ve completely dusted every area of the room, use a vacuum to clean up any that may have fallen onto the floor.
As speed cleaning becomes a more regular part of your routine, you’ll learn what works and what doesn’t. Keep a journal of what you’d like to do differently going forward and incorporate that approach into your clean the following week. The more time passes, the more you’ll settle into a perfect routine.
Bennett Kleinman Staff Writer
Bennett Kleinman is a New York City-based staff writer for Optimism Media. He is also a freelance comedy writer, devoted New York Yankees and New Jersey Devils fan, and thinks plain seltzer is the best drink ever invented.
Your home is meant to be your sanctuary, but it’s hard to feel relaxed when it stinks like a dirty locker room or zoo full of animals. While basic cleaning supplies help keep those odors at bay, they also leave an artificial smell that can be even worse. Rather than settle for these unpleasant odors, plenty of clever household hacks can improve the smell of any home in a major way. Even better, these methods all utilize non-toxic ingredients that are probably already lying around. Here are seven surprising ways to make your house smell better than ever.
Place a single drop of vanilla extract on any lightbulb in your home. When you turn the lights on later, the bulb’s heat will activate the smell, much like the heat of an oven makes the entire house smell like delicious cookies. If you’d prefer, you can use almond extract, maple extract, or any other flavor. In any event, your entire house will smell like a bakery in no time.
Credit: Unsplash+ via Getty Images
Place Essential Oils Inside the Air Conditioner
Begin by removing the old filter from your air conditioner and buying a new one. Before installing the filter, place 20 drops of your favorite essential oil all over the filter, whether you prefer peppermint, eucalyptus, or any other scent. Then, install the filter and boot up your HVAC system. The pleasant odors will permeate throughout the home.
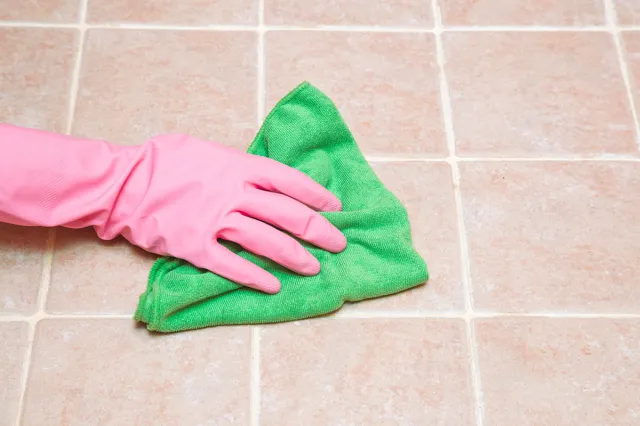
Bathroom floors can soak up some pretty repulsive odors, leaving us no choice but to clean them with ammonia and other harsh chemicals. But before you resort to those chemical cleaners, try using foam shaving cream. Put on a disposable glove, coat your hand in foam shaving cream, and cover the tile in foam — be sure to get into the grout as well. After 20 minutes, wipe away the shaving cream using a clean rag. This should neutralize those persistent odors, leaving your bathroom smelling fresh.
Fresh lemon juice can make your kitchen appliances smell better in many ways. One method is to squeeze lemon juice into a bowl, soak up the juice using cotton balls, and place the balls inside the fridge, dishwasher, and any other musty appliance. After a few hours, the lemon-soaked balls should absorb those unpleasant odors and leave your appliances smelling better. You can also freshen up the microwave using lemon; mix one cup of water with three tablespoons of lemon juice in a microwave-safe bowl and run it in the microwave for five minutes. Your microwave should smell a lot fresher afterward.
Place a small pot filled halfway with water on the stovetop and turn the heat on low. Then add several slices of lemon, orange, grapefruit, or other pungent citrus. Depending on personal preference, you can also throw in herbs like mint and rosemary. Let the concoction simmer on the stovetop for as long as you’d like, producing a delightful citrusy smell that fills the entire home.
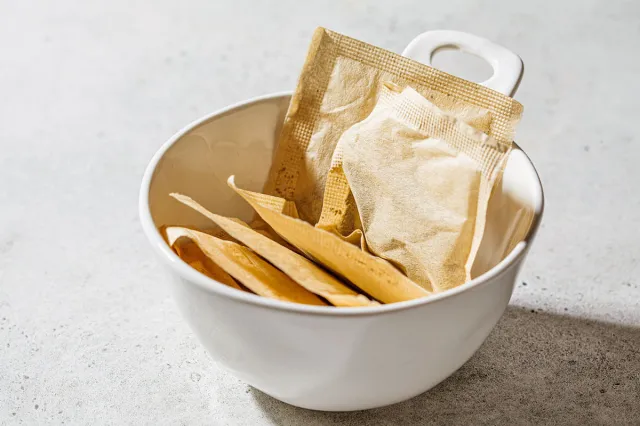
Put your favorite tea bag or loose leaves in a cup and place it inside a musty drawer or closet. The fragrant scent of the tea should help cover any unpleasant odors. You can also leave random tea bags around the house in bowls and cups to bring a little bit of their delightful fragrance into any room.
There’s nothing worse than the smell of hot garbage flooding through the kitchen into the rest of your home. To cut down on those awful garbage smells, take a few cotton balls, soak them in your favorite essential oil or some lemon juice, and throw them into the bin. Feel free to add more cotton balls as you fill the garbage. This should keep the smell at bay until you’re ready to throw out the trash.
Bennett Kleinman is a New York City-based staff writer for Optimism Media. He is also a freelance comedy writer, devoted New York Yankees and New Jersey Devils fan, and thinks plain seltzer is the best drink ever invented.
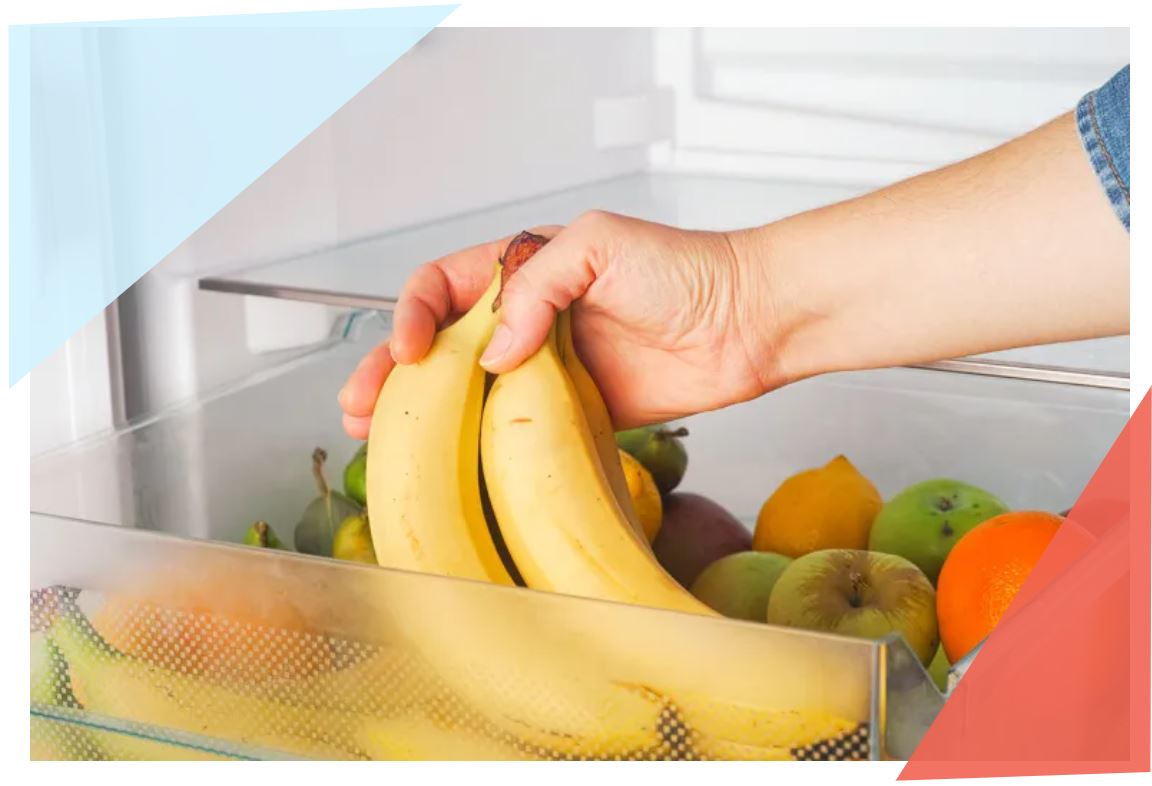
Some things clearly belong in the refrigerator: eggs, yogurt, milk… these are no-brainers. Condiments and sauces can get a little murky, since not all truly need a stay in the fridge after opening. When it comes to shelf-stable foods, well, most of us don’t think twice about tossing a package of cashews or tortillas into the pantry (after all, they’re not refrigerated at the grocery store). But a handful of pantry staples can benefit from storage at a brisk 40 degrees. Cool temperatures can preserve their flavor and nutritional value until you’re ready to enjoy them — here are eight that benefit from moving off the counter and into your fridge.
Snack sticks, jerky, salami, and other cured and dried meats don’t have to be refrigerated, but keeping them wrapped in butcher paper in your lunch meat drawer has its perks. Storing salami and other dry-cured meats at cool temps protects their flavor, reduces bacteria growth, and keeps them from drying out, especially after you’ve opened and cut into the roll.
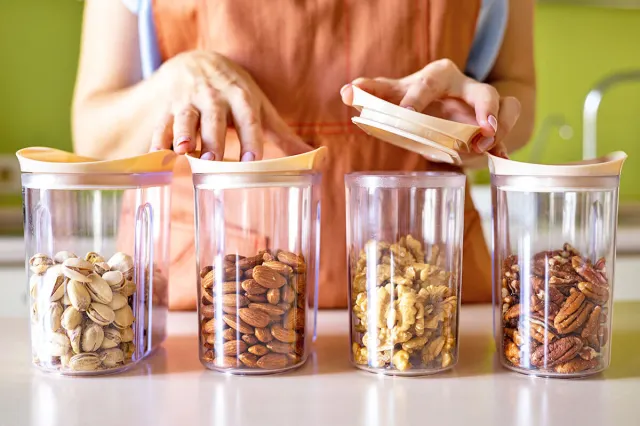
Nuts are relatively shelf-stable, so most people toss them in the pantry. However, the unsaturated fats that make them a healthy snack choice can actually be their long-term storage downfall. When exposed to warm temperatures and light, unsaturated fats in nuts begin to break down, slowly turning your entire stash of cashews or almonds rancid. Storing nuts in a closed container in the fridge slows this process, and keeps them fresh for up to six months.
Grocery stores typically keep tortillas in the bread aisle, which is why many of us store them on the counter. However, a closer look at the packaging often reveals a fine print recommendation to refrigerate after opening. Exposure to heat helps mold and bacteria take root (especially in flour tortillas), so tossing leftover tortillas into the fridge in a sealed bag can help them last until your next Taco Tuesday.
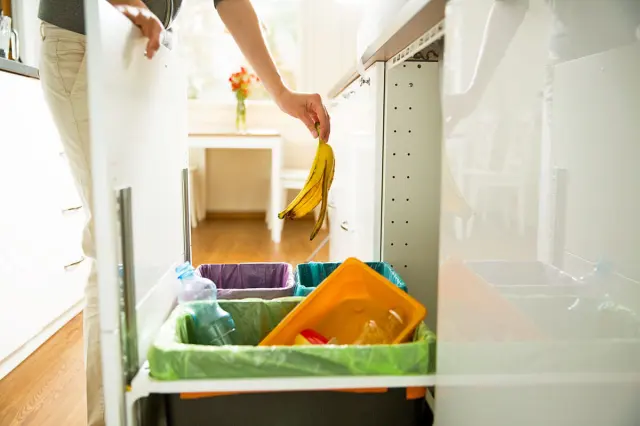
Getting a perfectly ripe banana is tough — and entirely subjective. While 47% of Americans opt for a solid yellow banana, 31% prefer at least a few brown spots. Whatever your preference, you can pop bananas into the fridge to pause ripening until you have a chance to eat them.
Do you keep your leftover pie in the fridge or on the counter? This common kitchen debate rears its head around Thanksgiving (usually when fridge space is at a premium). Nutrition experts recommend storing any pie, cobbler, or dessert made with refrigerated dairy ingredients in the fridge to prevent bacteria and mold. Custard, cream, and pumpkin pies can sit out at room temperature for a maximum of 2 hours, and fruit pies without dairy (like apple or cherry) can stay on the counter for up to 2 days before needing refrigeration.
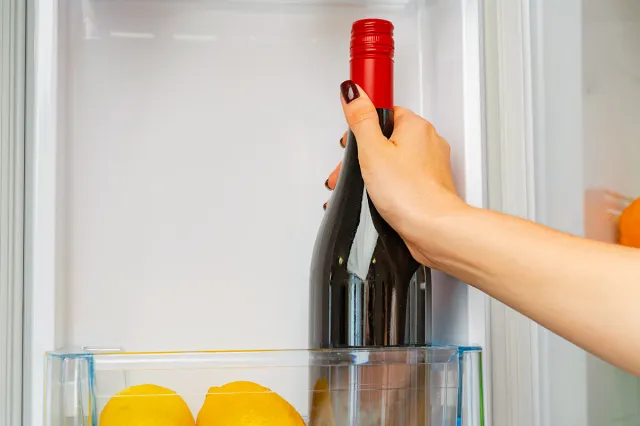
Popping a cork or stopper into a half-finished bottle of wine won’t guarantee it remains fresh until you’re ready for another glass. Wine begins to oxidize once the bottle is uncorked and the delicious liquid inside is exposed to air; this chemical reaction can give your glass of vino a flat taste and off-color appearance. While refrigerating can’t stop oxidation, it can slow it down to save your leftover wine for another occasion.
Corn fresh from the field is sweet and juicy… but not when left at room temperature for days on end like other produce. The sugar in sweet corn breaks down after it’s harvested, and the cobs slowly dry out when left on the counter. Make sure your corn on the cob is a barbecue hit by leaving its husk on (which protects against decay) until the day you eat it and placing the ears in a produce bag before refrigerating.
Unlike artificial syrups, pure maple syrup doesn’t contain any preservatives to help it stay fresh at room temperature. It’s also not as cheap — so protect your morning breakfast investment by keeping pure maple syrup in the fridge, allowing it to grace your morning pancakes and waffles for up to a year (if you don’t eat it all first).
Nicole Garner Meeker is a freelance writer, research editor, and Optimism contributor. Based in St. Louis, she’s an enthusiastic gardener, fiber artist, and connoisseur of fine snacks.
They say a craftsman is only as good as his tools. If that’s the case, you’re about to become Gordon Ramsey by the end of this article (minus the temper tantrums, we hope). The ingenious kitchen gadgets below will transform your home cooking skills, improve your dishes, and save you time and effort. They’ll also make cooking a lot more fun.
Prices are accurate as of April 10, 2024. Subject to change. All featured products and deals are selected independently and objectively by the author. Better Report may receive a share of sales via affiliate links in content.
Your grandmother grew vein-popping forearms by stirring thick stews and prepping hearty dishes, but you no longer need to bulk up to handle such recipes. This Automatic Pan Stirrer does the heavy lifting for you. Pop it in the pan and let it go to work. Available in both a battery-powered and a rechargeable model, the clever device stirs any sauce over low heat so you can move on to the next part of the recipe.
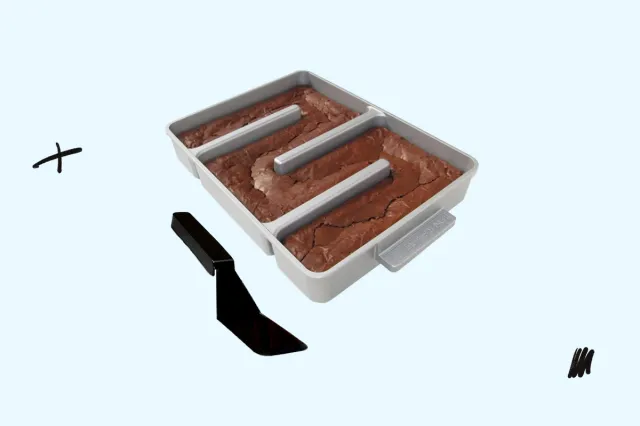
We all know the best brownie is the corner brownie. The combo of crisp sides and gooey middle is unmatched. It’s a shame you have to deal with those pesky middle pieces, right? Well, no more. The Baker’s Edge Brownie Pan produces only edges and corners. A nonstick coating on the heavy gauge cast aluminum makes popping brownies out a breeze, so all you need to do is grab the vanilla ice cream and go to town.
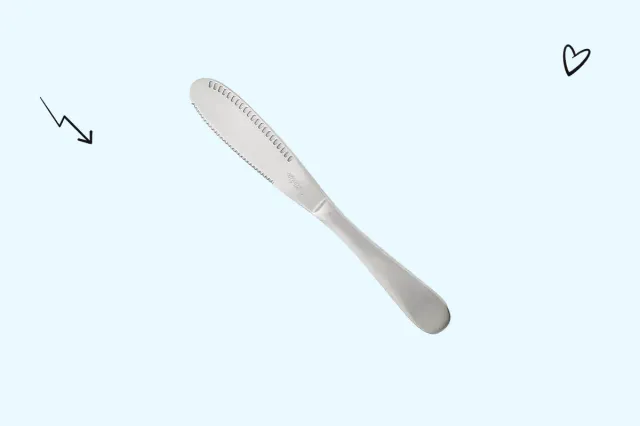
If you’ve ever destroyed a slice of Wonder Bread trying to drag a thick, stiff slab of butter across it, you’ll understand the value of this innovative knife. The perforated blade easily glides across a stick of butter, creating ribbons that are easy to spread across a piece of toast.
If you’ve ever tried to hold a pot lid slightly ajar to strain spaghetti only to lose precious pasta to your garbage disposal, you’re not alone. A far better way to strain pasta and other boiling bites, for that matter, is the Strap N Strain Pot Strainer. This silicone device clips onto pots and pans and allows for error-free straining. The dishwasher-safe tool is a space-saving alternative to bulky colanders.
A dull knife is a dangerous knife. Unfortunately, honing steels requires a bit of a learning curve. Luckily, the Tumbler Original Diamond Rolling Knife Sharpener is a sleek alternative to the classic metal wand. A magnet secures the knife blade and lets you sharpen your knives at a 15- or 20-degree angle, leaving your most important kitchen tool sharp and safe.
The reBoard looks just like a humble cutting board and functions like one, too. The innovation comes in the way it’s manufactured. The reBoard is made entirely of plastic kitchen scraps and renewable sugar cane, making it the most eco-friendly way to prep your mirepoix. Available in a range of attractive colors, the reBoard has sold out 10 times already, so pick one up as soon as you see it available from Material, a kitchen brand we adore.
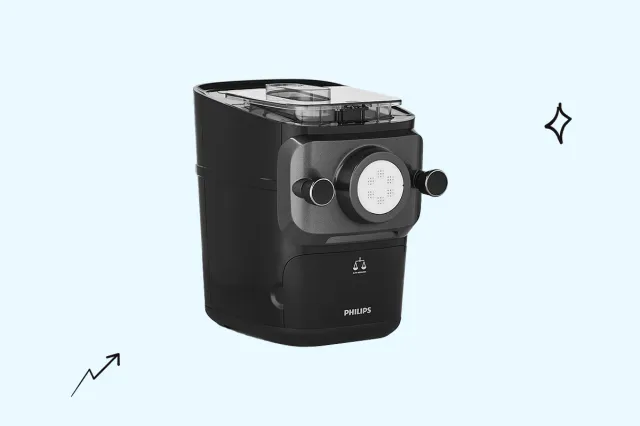
Two things are true about fresh pasta. One, it’s far superior to the dried pasta you buy from the grocery store. Two, it’s a pain in the butt to make. Well, at least that second one used to be true. With the Philips Artisan Smart Pasta & Noodle Maker, you can whip up fresh pasta without rolling and flattening dough for eons. Simply add flour and water, and then press a button. In minutes, you’ll have spaghetti, lasagne, penne, or numerous other shapes.
You’ve heard of the spork — now meet the Supoon. Its clever design lets your counter stay clean after stirring a sauce or pushing veggies around a pan. It also comes with a built-in measurement system so that you can add liquid ingredients without reaching for a tablespoon or teaspoon.
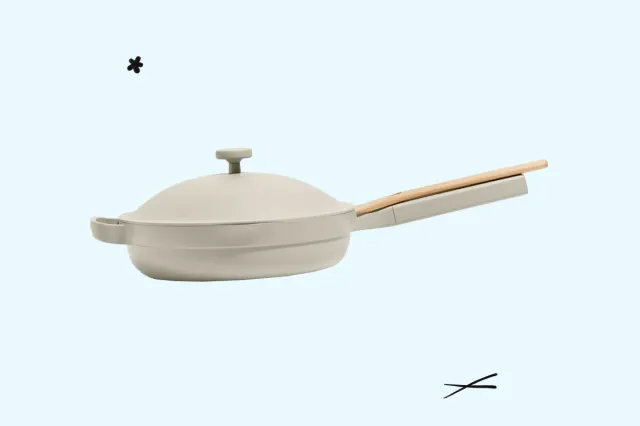
Speaking of clean countertops, the Always Pan 2.0 offers the same mess-free cooking in a more robust and attractive package. The gorgeous ceramic pan holsters the included spatula right on its handle, ensuring you don’t need a spoon rest or a folded paper towel to get tomato sauce from dripping all over your cooking space. Available in an array of eye-catching colors, the ingenious pan also includes a steamer basket, so you can do more than simply cook an egg with it.
The difference between a great cocktail and a watered-down beverage is all in the ice. Instead of the cubes in your freezer, craft a cocktail bar-worthy cube with the Vevor Ice Ball Press, which produces large crystal-clear rocks to add to whatever you’re imbibing. Made from aircraft-grade alloy, the heavy-duty ice press is your first step toward becoming a home mixologist.
Checking to see if your steak or chicken is done is a perilous process. Wait too long, and your dinner will be drier than the Sahara, but serve too soon, and you could make your guests sick. The Meater eliminates the guessing game. The thermometer works with your smartphone to let you know precisely when to turn off the heat or remove dinner from the grill. Even better? No more metal wire dangling in your way while you cook.
No one has figured out how to clean a whisk properly. We resort to running tap water over the handle, so it cascades down over the soapy tongs. But our days of whisk worry are over thanks to the Whisk Whiper, a why-didn’t-anyone-think-of-this-earlier device that makes cleaning whisks super simple. Just pull the Whisk Whiper over your whisk and toss it back in the drawer. Problem solved.
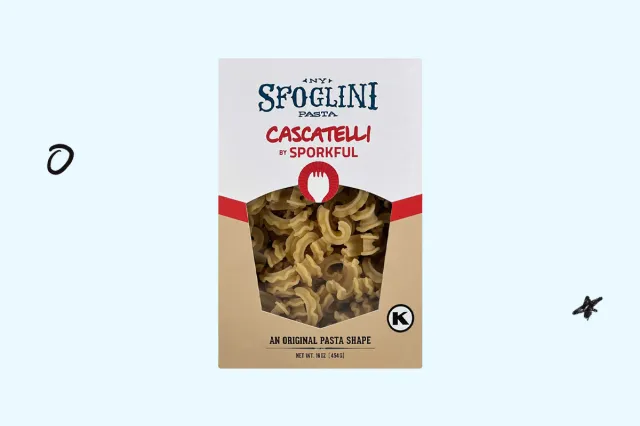
Cascatelli isn’t a gadget in the traditional sense, but it is clever and delicious. Cascatelli, from the Italian word for “waterfalls,” is a new shape of pasta designed to offer the perfect bite. Developed by Dan Pashman, a James Beard Award winner and the host of the Sporkful podcast, Cascatelli adheres better to the sauce, is easy to spear with a fork, and offers the most satisfying bite. Don’t take our word for it. Pick up a box and taste for yourself. Say goodbye to penne forever.
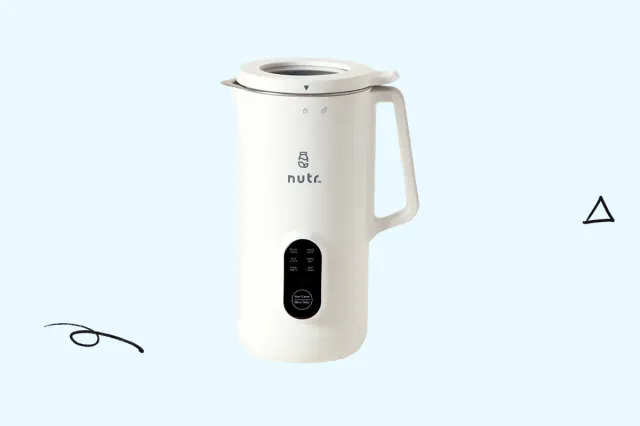
If you’ve ditched cow’s milk in favor of a non-dairy alternative you know how expensive this swap can make your grocery bill. Enter the Instant Plant-Based Milk Maker, which automatically grates nuts of your choosing to produce a creamy alternative for your coffee and cereal. It even heats the milk for you so your latte stays warm.
The scent of cooked fish can linger in your kitchen for hours. Grease can splatter in the toughest-to-reach spots. Smoke from a hot oven can set off your smoke detector in a jiffy. Say farewell to these dilemmas with the AirHood Wireless, the world’s first portable kitchen air cleaner. Run it in your kitchen when you cook, and it will extract fumes, filter the air, and make dinner prep less of a mess.
The last thing you want to do while baking is drag your dough-encrusted finger across your phone to look up how many cups are in a quart. With the OXO Good Grips Silicone Pastry Mat, you no longer have to. The workstation doubles as a cooking cheat sheet, with important info printed right on it. Make the perfect size cake, find a baking powder substitute, and convert measurements without lifting your head.
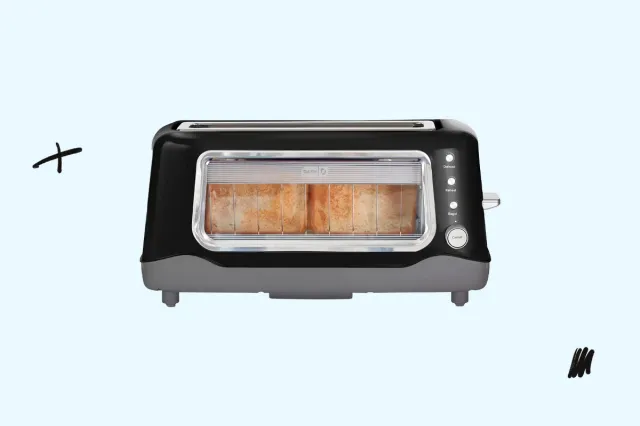
We’ve burned countless pieces of toast, which is why we wish we had the Dash Clear View Toaster earlier in our lives. Plenty of perfect pieces of bread wouldn’t have been tossed in the trash. That’s because the toaster lets you see what’s cooking. Pop in your bread and keep an eye on the toaster to see when it’s just the right amount of done.
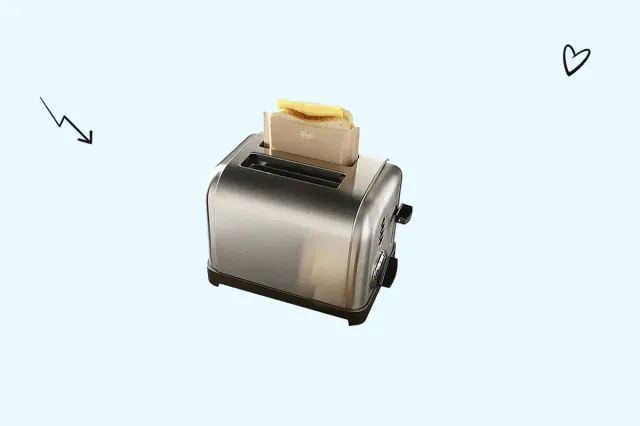
Since we’re on the topic of toasters, why not try making a few grilled cheese sandwiches in your new Clear View Toaster? If that sounds like a mess, you’re right… unless you’re using these Toaster Grilled Cheese Bags, which let you make America’s favorite sandwich right in your toaster oven. No more cleaning butter and cheese off a saute pan. Simply put your sandwich in a bag and drop it in your toaster. You just need to handle the tomato soup.
If you rely on a store-bought pepper grinder preloaded with peppercorns, prepare to take your spice game up a notch. The FinaMill Spice Grinder is designed for one-hand operation, which comes in handy more than you might imagine. Just think of all those times one of your hands had bits of food on it while you prepped dinner. Further, it’s designed to accept spice pods you fill, so you can swap spices in and out, using only the freshest ground ingredients.
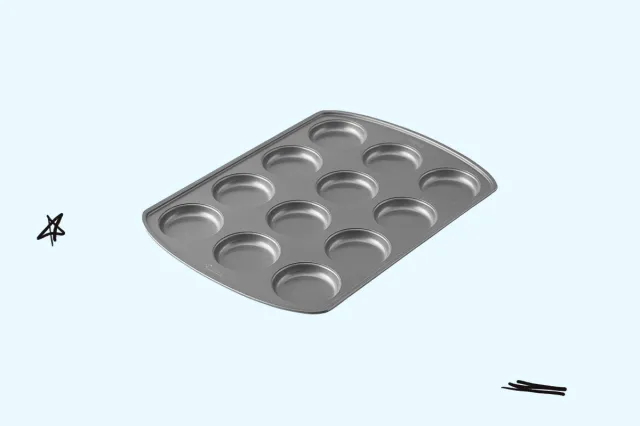
As explained on Seinfeld, the muffin top is the best part of a muffin. This undeniable truth has led to a lot of wasted muffin bottoms. But no more. The Wilton Muffin Top Pan allows you to bake only the good parts. Sure, you could use it for cookies and other treats, but the real revelation here is that your muffins will become smaller but oh so much more delicious.
Stripping and chopping herbs is a pain and a time suck. Skip the hassle with a pair of these Herb Scissors. Instead of chopping, you’re snipping. Watch your output skyrocket as you make quick work of fresh herbs, green onions, lettuce, and more.
How much peanut butter have you tossed because a jar was almost empty? How many jams, preserves, and other mason jar-filled condiments have met the same fate? The Sleek Spoon is here to save those last delicious bites. The design lets you scrape around the sides and bottom to enjoy every last morsel.
Low and slow is the name of the game when it comes to cooking sous vide. The result is the most tender meat you’ve ever tasted. We’re talking 48-hour short ribs and the like. Seal your cut in a bag, place the sous vide device in a water bath, add the bagged dinner to the pot, and wait. You’ll have a hard time going back to baking dishes in the oven.
For some, preparing a bowl of cereal is as far as their culinary adventures extend. But there are improvements for this crowd, namely, the Just Crunch Anti-Soffy Milk Bowl from Just Solutions. The bowl is divided into two parts: one for your cereal and one for your milk. Simply scoop and dunk, or push some cereal over the edge. The result? No more soggy, mushy last bites.
The last one is a personal favorite. The Zojirushi Rice Cooker is a dinnertime game-changer. It cooks all varieties of rice with little to no effort, but it also handles porridge, steams food, and does so much more. That it plays a delightful melody when your food is ready is just an added benefit.
Featured Image Credit (clockwise from top left): Courtesy of Sfoglini; Courtesy of Amazon; Courtesy of Amazon; Courtesy of Material; Courtesy of Alessi
Mike Newman Chief Brand Officer
Mike is a writer and editor based in New York. He led tech and product coverage at Cool Material for seven years, and his work has appeared on ESPN, Buzzfeed, and Thrillist.
Buying a home is exciting. However, scammers may try to use your excitement and inexperience against you. Watch out for these attempts to defraud you.
Partner Companies
Be wary if you receive a letter from a company claiming to be a partner or associated with your mortgage lender wanting additional information for your loan. Since you have already closed on your home, it is a scam. Do not give out your personal or financial information.
Deed Processing Notice
If you get a bill stating you owe money for a copy of your deed or property assessment profile, don’t pay it. Property deeds are mailed to you free after a sale or transfer. If you need an additional copy, you can order one through your county clerk’s office.
Business Imposters
Legitimate utility companies will not call or show up at your door asking for payment through a money order, cryptocurrency, or other nontraceable forms. They also will not ask to see your bill or account information. When you receive a bill, always verify the email, business address, and phone number is correct. Fraudsters often use real company names and logos to trick you into thinking the bill is real.
Home Warranty Con
Did you know you are not required to purchase a home warranty? If you want one, research and contact companies with good reputations. Beware of companies claiming your home warranty is expiring or has already expired and that payment is needed.
Loan Scams
Companies that urge you to refinance shortly after closing make money on excessive loan fees—putting you at a higher interest rate than you currently have. It’s always best to research the best lender for a refinance instead of responding to a cold call or advertisement.
Since this is not an exhaustive list, work with your trusted REALTOR®. Ask for advice on how to spot real estate scams and ways to protect yourself.
It’s time to take a stand against unwanted guests at summer picnics. That’s right, we’re talking about mosquitoes. Nothing ruins a backyard barbecue like the smell of mosquito repellant wafting through the air, not to mention itchy, swollen bug bites. Fortunately, some household items can work double-duty as a mosquito repellant and are surprisingly effective. Here are some fast, simple, realistic ways to create homemade mosquito repellents using items you might already have.
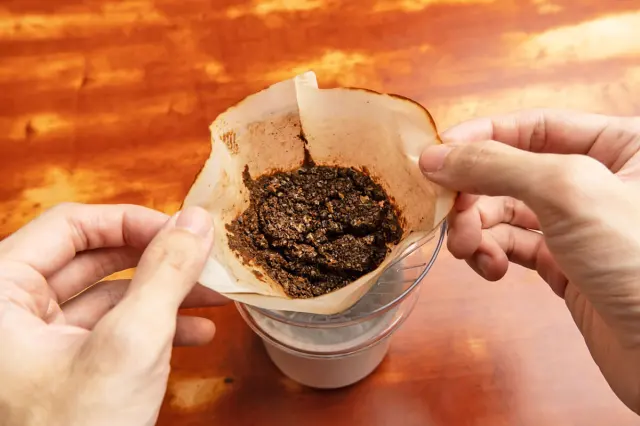
Don’t toss your leftover coffee grounds in the trash just yet. Although coffee is part of many morning routines, insects don’t share in this ritual — they downright hate coffee. According to the pest control experts at Mr. Mister Mosquito Control, “Mosquitoes are repulsed by all types of coffee, whether it is fresh, used, or burnt.” Sprinkle coffee grounds around your patio, pool, garden beds, and potted plants. (Coffee grounds also have vital nutrients that can boost plant health.) For even better results, burn coffee grounds to amplify the smell. To do this, find a heat-safe container, such as a recycled candle jar, and pack in the grounds. Then, light the grounds at the center and watch the coffee-scented smoke effectively repel unwanted garden guests.
Do-it-yourself sprays are a low-cost and effective way to dissuade mosquitoes. One of the best sprays is garlic oil — it’s even used in professional pest control products. Mosquitoes dislike the sulfides in garlic, which give it its pungent smell, so they’ll steer clear of your home. To make garlic spray yourself, blend a few cloves of garlic and water, then strain the mixture into a spray bottle using a mesh colander. Fill the rest of the bottle with warm water, shake, and spray away.
Mosquitoes hate lemongrass, thyme, chamomile, cedarwood, rosemary, citronella, eucalyptus, tea tree, and lavender essential oils. These can be added (a few drops at a time) in water to make a spray for inside and outside the home and on yourself. “These essential oils are found to be a mask for the odors that female mosquitoes are attuned to when searching for a blood meal,” explains pest control specialist Shannon Harlow-Ellis. If you’re wondering how long these DIY repellents last, follow this rule: “Once the fragrance is gone, the repellency is gone,” says Rita Stadler of Earth Kind. You should be ready to reapply repellent frequently to reap the benefits.
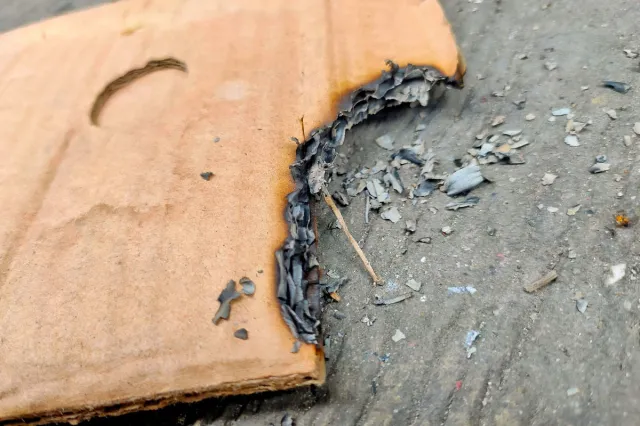
Mosquitoes can’t stand smoke, but sometimes, lighting a roaring campfire in the middle of the day isn’t practical. Instead, head to your recycling bin. You can burn any type of cardboard box, including egg cartons (not the styrofoam kind), pizza boxes, and drink holders. Place the cardboard somewhere safe to burn, such as in a firepit on your grill, and let it rip. You’ll be pest-free in no time.
This Martha Stewart-approved DIY mosquito repellent lotion will surely be a summertime hit — you can even make it with your kids. All you need is two ingredients: coconut oil and peppermint essential oil. Mix around one-third cup of coconut oil with 15 drops of peppermint essential oil and store in an air-tight jar. This mixture will be very soft or liquid at room temperature, but storing it in the fridge transforms it into a solid lotion. Apply it with your hands anywhere on your skin to deter mosquitoes. Tip: If you aren’t a fan of peppermint, use a different essential oil.
Cinnamon can repel all sorts of insects. Brunch With Babs, who has reached millions on social media, shared her go-to recipe for cinnamon spray. Whisk two teaspoons of cinnamon powder into four cups of warm water. Let it steep for a few minutes (as you would tea), and drain it into an empty spray bottle using a mesh colander. Next, add half a teaspoon of rubbing alcohol and half a teaspoon of dish detergent. Shake to mix and spray it anywhere outside — it can even be used on yourself! Tip: Cinnamon sticks can have the same effect, so try using them as table decorations or garnishes during your picnics.
Move any portable fans outside when prepping for a summertime picnic or outdoor dinner. Mosquitoes are naturally weak fliers, so you might’ve noticed you get more bites on still, humid days than on breezy ones. Fans disrupt airflow enough to block the bugs’ paths. Studies also suggest that fans help disperse odors and confuse mosquitoes, who follow chemical cues when searching for their next meal. Any fan will do, but an oscillating pedestal fan is the best option to cover a large outdoor area such as a patio. This option from Lasko is a great choice and is backed by over 1,500 strong reviews.
Lure mosquito-eating predators into your yard with items you already have in your home. Birds are an incredible natural mosquito repellent — they eat hundreds of insects daily. Attract more birds to your home by keeping your bird feeders well-stocked. To find which bird seed is best for your yard, research what your local bird population eats. Some DIY birdseed items you might already have around the house include peanuts, cracked corn, almonds, oats, pecans, walnuts, dried fruit, and sunflower seeds. You can also make DIY bird feeders using empty bottles or milk cartons.
Rachel Gresh Writer
Rachel Gresh is a Washington, D.C.-based freelance writer. When she’s not writing, you can find her wandering a museum, exploring an unfamiliar city, or baking something new in the kitchen.